Introduction
Odoo Studio is a powerful tool that allows businesses to customise their Odoo ERP environment without needing deep technical knowledge. With its intuitive drag-and-drop interface, even non-developers can create custom models, workflows, and dashboards. However, many users only scratch the surface of what Odoo Studio can do.
In this detailed guide, we’ll uncover advanced tips and tricks that will help you unlock the full potential of Odoo Studio, automate complex processes, and create a seamless user experience.
Why Master Odoo Studio?
✅ Reduces dependency on developers
✅ Accelerates customisation and deployment
✅ Increases efficiency through automation
✅ Improves data accuracy and reporting
1. Creating Custom Models and Relationships
Odoo Studio allows you to create custom models tailored to your business needs.
✅How to Create a Custom Model
- Click on the Odoo Studio icon
 in the top right hand corner.
 - Now click + New Model in the top right hand corner.

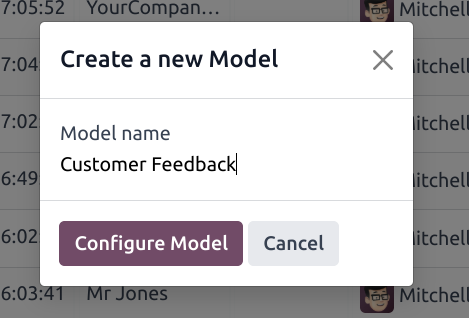
- Now it will appear dialog box were you can write model name and click Configure Model.
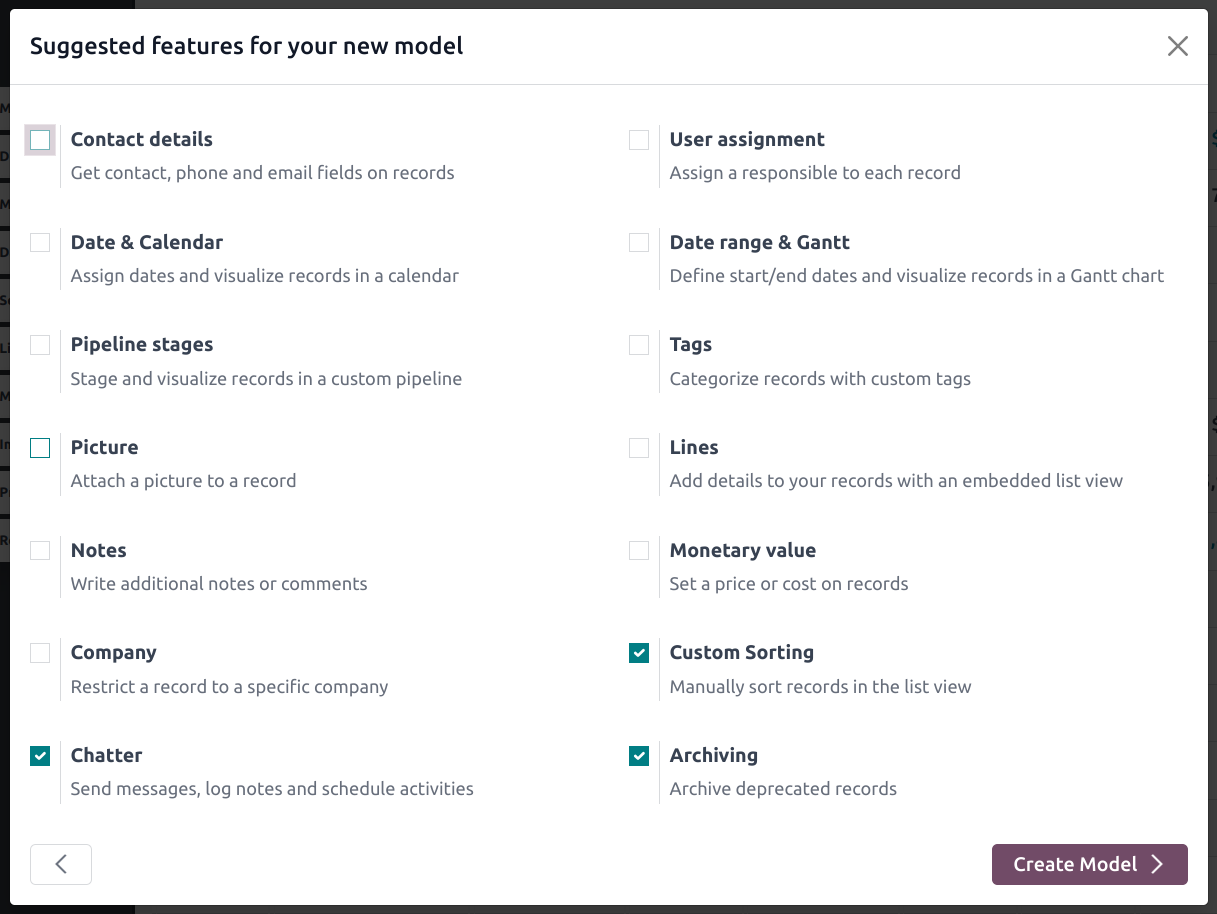
4. Now it will display now quick configure screen were you can choose which type of data fields you want, just select and click on Create Model.
5. Also you can then define fields such as text, integer, date, and computed fields
6. Use relational fields like Many2One and One2Many to link different models
7. Add dynamic field calculations using computed fields
💡 Example: Create a custom "Customer Feedback" model linked to "Sales Orders" to track customer satisfaction.
2. Automating Workflows with Conditions and Actions
One of the most powerful features of Odoo Studio is automation. You can automate repetitive tasks and create dynamic workflows based on field values.
✅ How to Automate a Workflow
-
Go to Settings / Technical / Automation / Automation Rules

- Click on Create and write title.
- Select Model. (e.g. Sales Order)
- Set a trigger State is set to = Sales Order (e.g., When Order Status = "Sales Order")
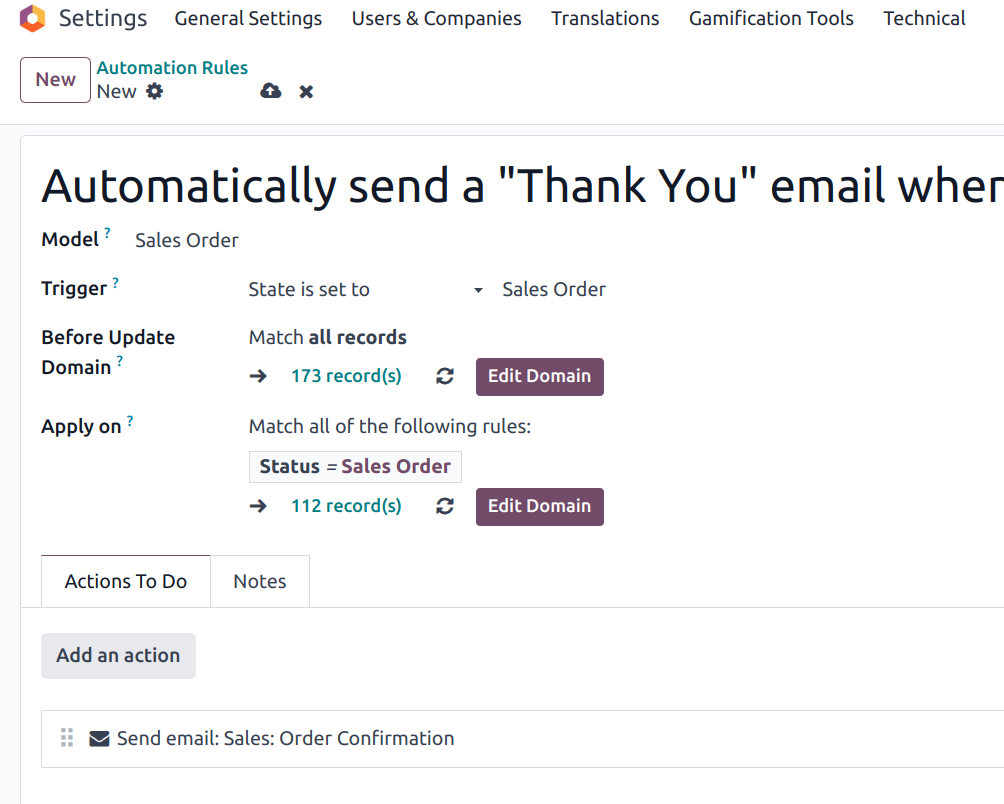
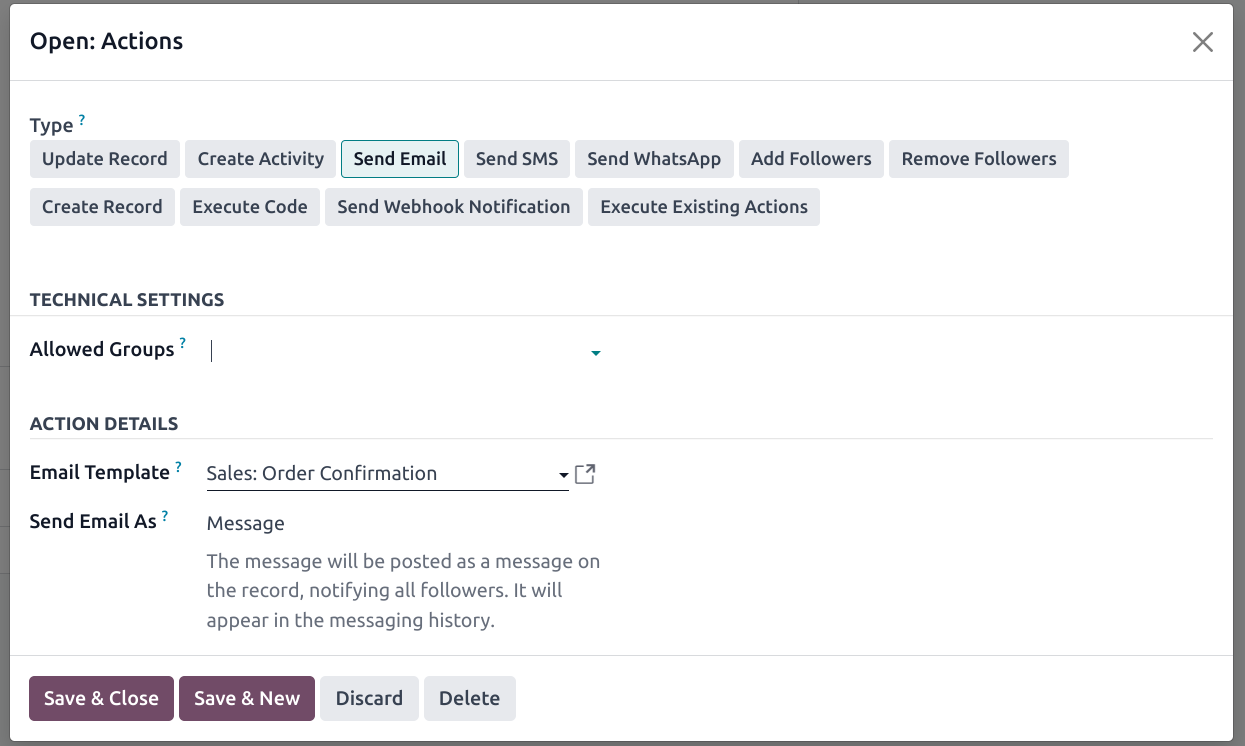
5. Add an action (e.g., Send an email, create a task, or update a field)
6. You can choose any action for example when sales order confirmed you want to send an email "Thank You".
Then select Send Email and choose allowed group, email template, send email as.
💡 Example: Automatically send a "Thank You" email when an order is marked as "Confirmed."
3. Enhancing User Experience with Conditional Visibility
Simplify complex forms by showing or hiding fields based on specific conditions.
✅ How to Set Conditional Visibility
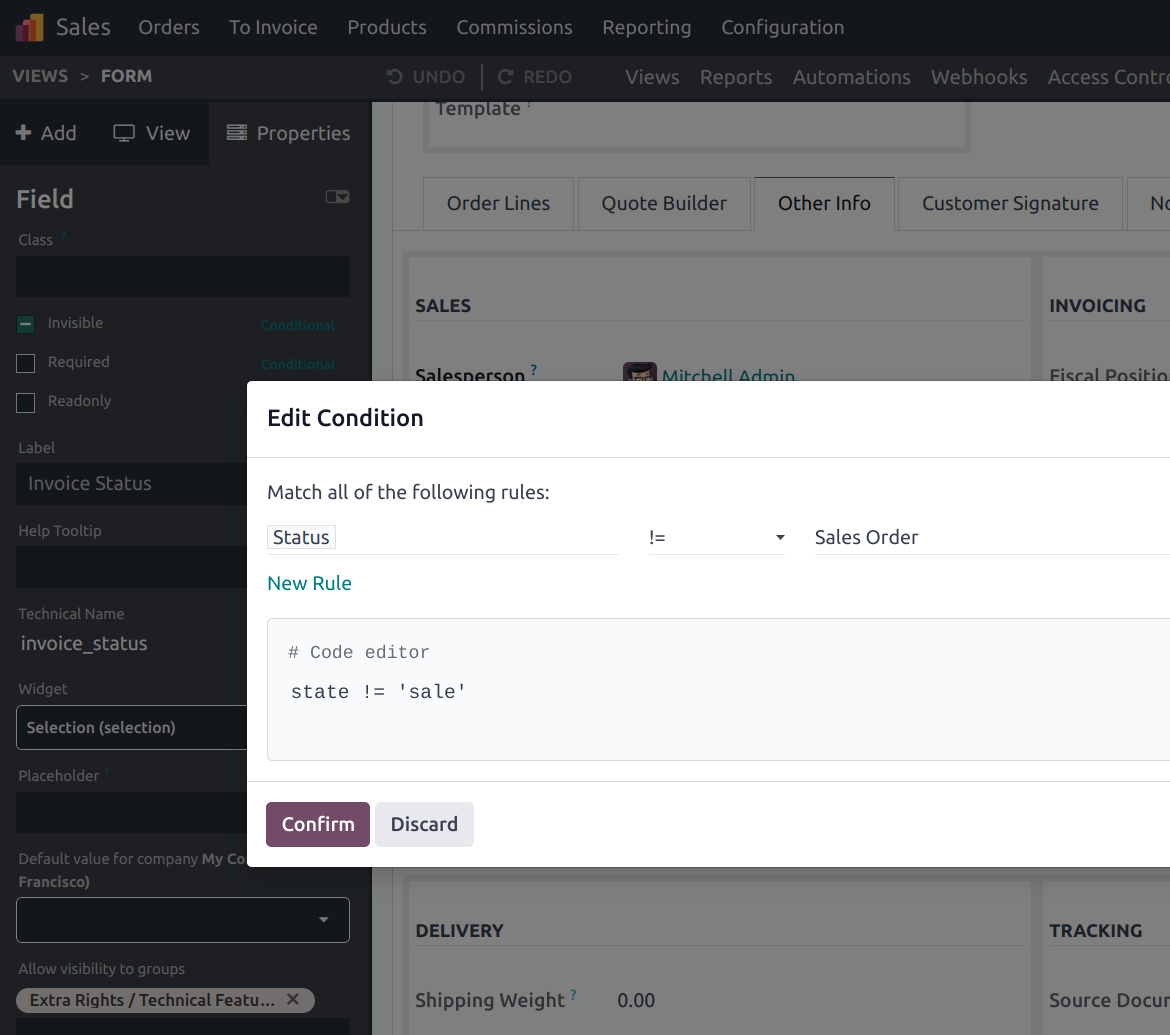
- Open Form View and click Studio icon to activate studio, select the field
- Define the visibility condition (e.g., Show only if "Order Status" = "Confirmed")
- There are many way to setup conditional visibility, required, readonly fields.
💡 Example: Display "Discount Code" only when "Payment Method" = "Online Payment."
4. Building Custom Dashboards with Real-Time Data
Dashboards in Odoo Studio provide real-time business insights and performance tracking.
✅ How to Build a Dashboard
- Go to Dashboards > Configuration > Dashboards
- Add widgets like graphs, KPI indicators, and pivot tables
- Use filters and grouping options to refine data
💡 Example: Create a sales performance dashboard that updates in real-time.
5. Embedding External Data Sources
Integrate external data sources with Odoo to streamline data flow.
✅ How to Link External Data
- Use the External API Connector
- Map external data fields to Odoo models
- Create automation rules based on this data
💡 Example: Sync customer data from a CRM with Odoo Sales and automate follow-ups.

6. Generating Custom Reports and Print Formats
Odoo Studio allows you to create custom reports tailored to your business needs.
✅ How to Create a Custom Report
- Go to Studio > Reports > Create New Report
- Use drag-and-drop to design the report layout
- Add dynamic fields and calculated values
💡 Example: Generate a detailed invoice report with tax calculations and customer information.
7. Using Developer Mode for Fine-Tuning
Enabling Developer Mode unlocks additional customisation options.
✅ How to Enable Developer Mode
- Go to Settings > Activate Developer Mode
- Use the XML editor to customise layouts and behaviour
- Fine-tune user access settings
💡 Example: Use XML to adjust the alignment and size of dashboard widgets.

8. Pro Tips for Mastering Odoo Studio
✅ Test all customisation in a staging environment before deploying
✅ Regularly back up your Odoo database to prevent data loss
✅ Monitor user feedback to continuously improve workflows
9. Common Mistakes to Avoid
❌ Overloading dashboards with too many widgets
❌ Creating complex automation rules that conflict with each other
❌ Ignoring user access permissions, leading to data leaks
Conclusion
Odoo Studio is a powerful tool that, when mastered, can transform how businesses operate. By applying these advanced tips and tricks, you can create highly customized workflows, automate tasks, and improve data accuracy — all without needing extensive coding knowledge.
👉 Start experimenting with these tips in Odoo Studio today and discover the true potential of your Odoo ERP!
